
Projects

Handmade Corbel using Ryobi Bandsaw
I have seen a lot of talk and posts about corbels and thought it would be the perfect starter project for my new band saw.
I have a 14" Rikon bandsaw and I know what you're thinking; "What do you need with a little 9" inch bandsaw when you have a massive Rikon?" (I have been asked) Well although the Rikon 14" is an awesome bandsaw, I am finding that it is actually easier to do smaller projects on the Ryobi bandsaw; mainly because its easier to maneuver smaller wood because of the size. So if you are a DIYer who loves to make smaller projects such as this one. This Ryobi 2.5 Amp 9 in. Band Saw is definitely the way to go!
(There are some affiliate links in this post, meaning I get a small commission if you purchase through these links, at no cost to you. Click Here to read my full disclosure)
Now lets get to it!
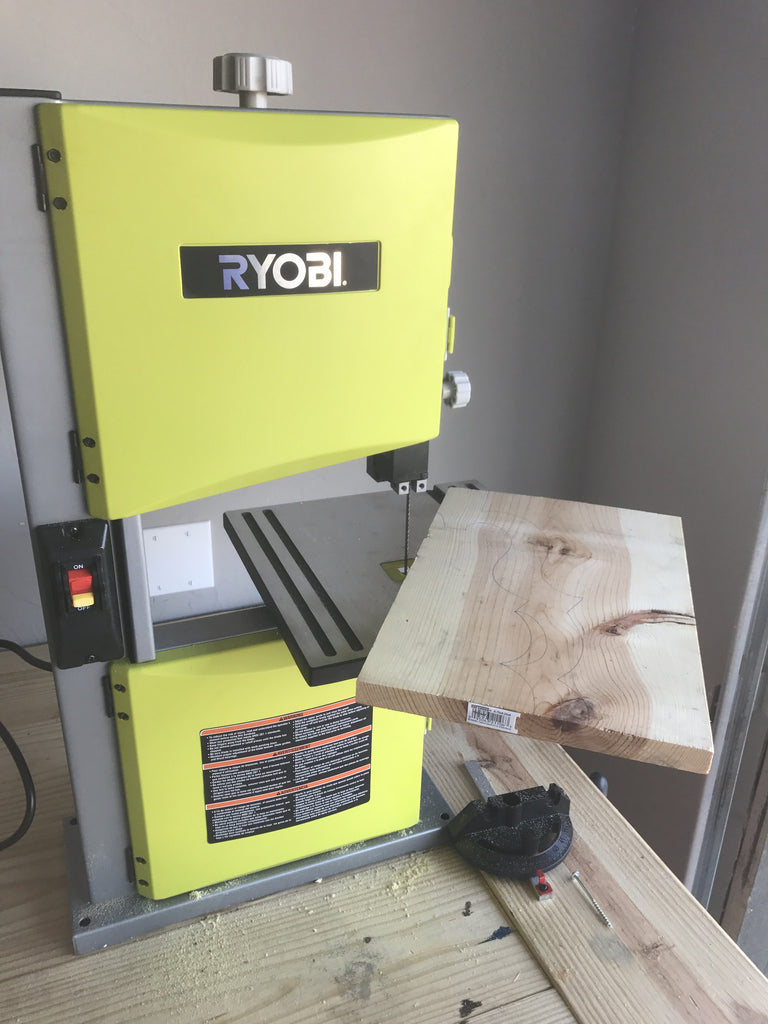
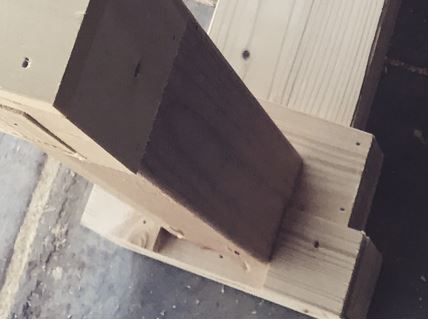
First I started of with a cut down 1 x 12 board.
I made this template for anyone who isn't confident in their scribble skills.
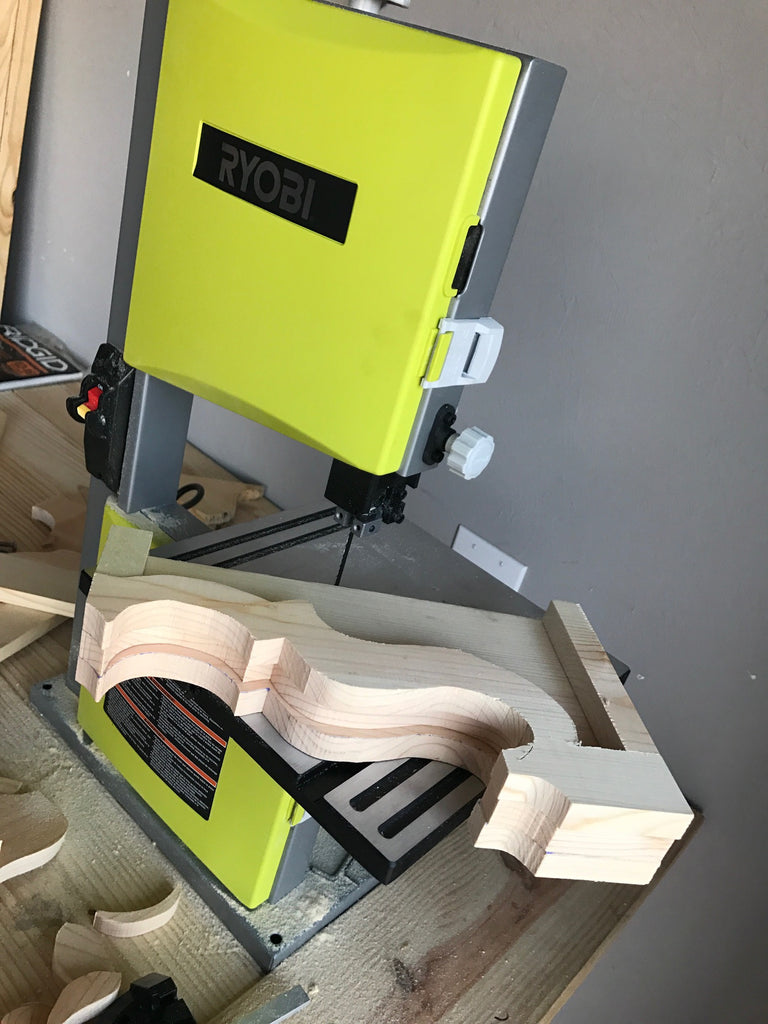
After tracing the template on the 1x12 board, I began cutting the outside pieces for the corbel.
Don't feel like you have to try and cut on the template line in one straight pass, you don't want to bend the blade too much;make sure you make relief cuts. Here's a picture of how I made my cuts.
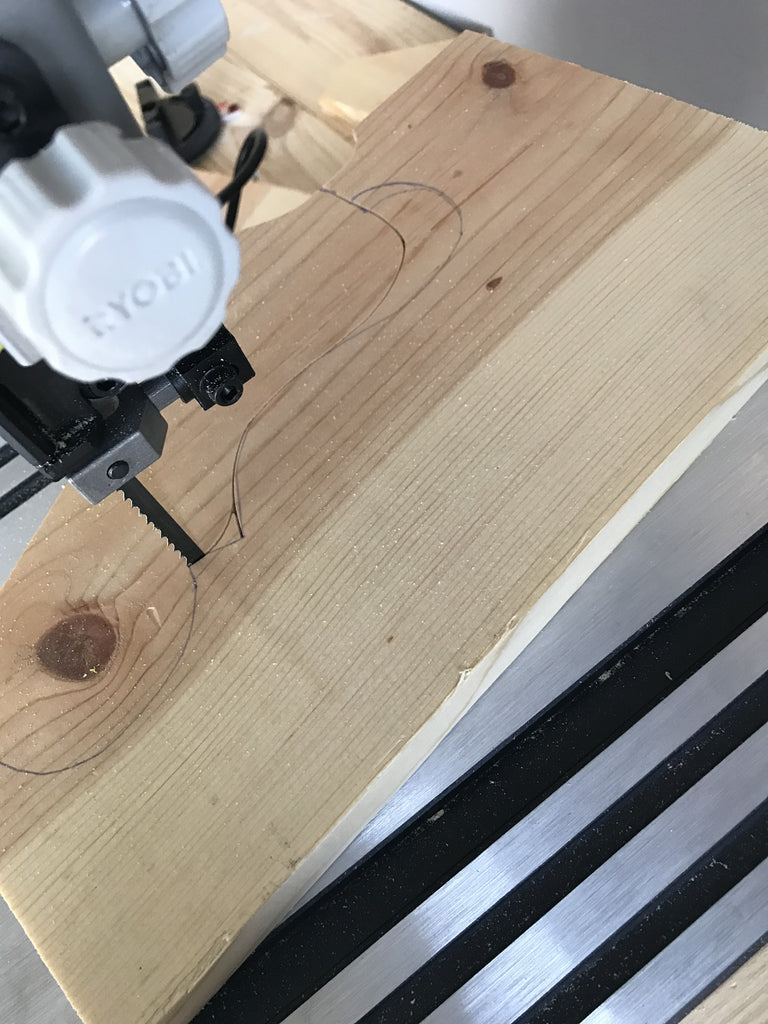
I made sure not to force the bandsaw when making my cuts, I curved around the sharp corners. Then I went back and cut the sharp corners. It makes life much easier and you don't risk the blade popping off. (Speaking from experience)
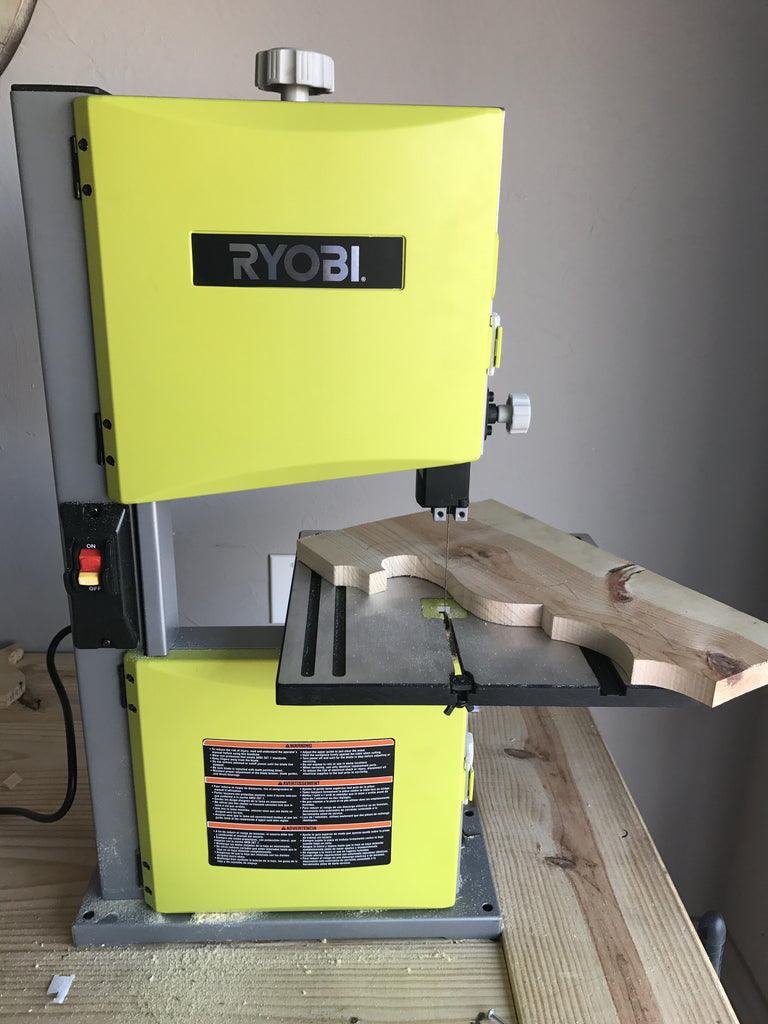
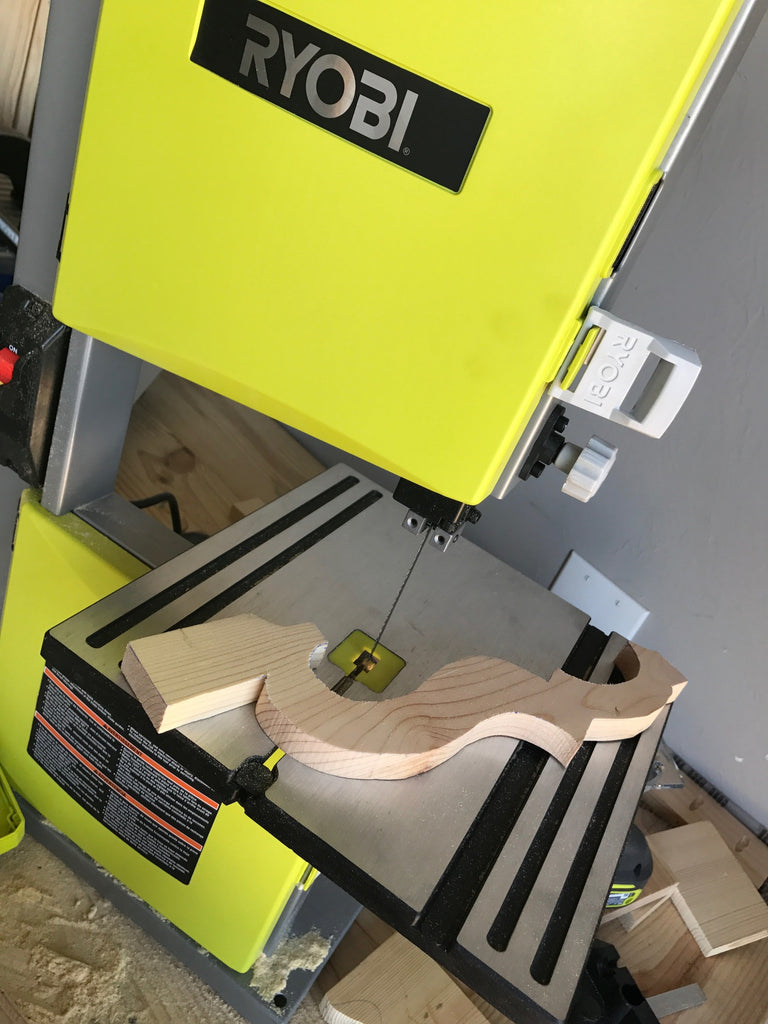
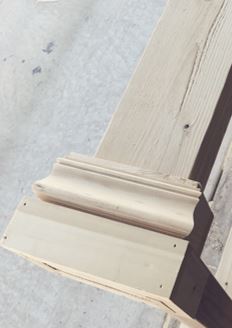
Once I finished cutting the two outer pieces I cut the inside piece. Trace your pattern or use the template pattern provided and cut away.
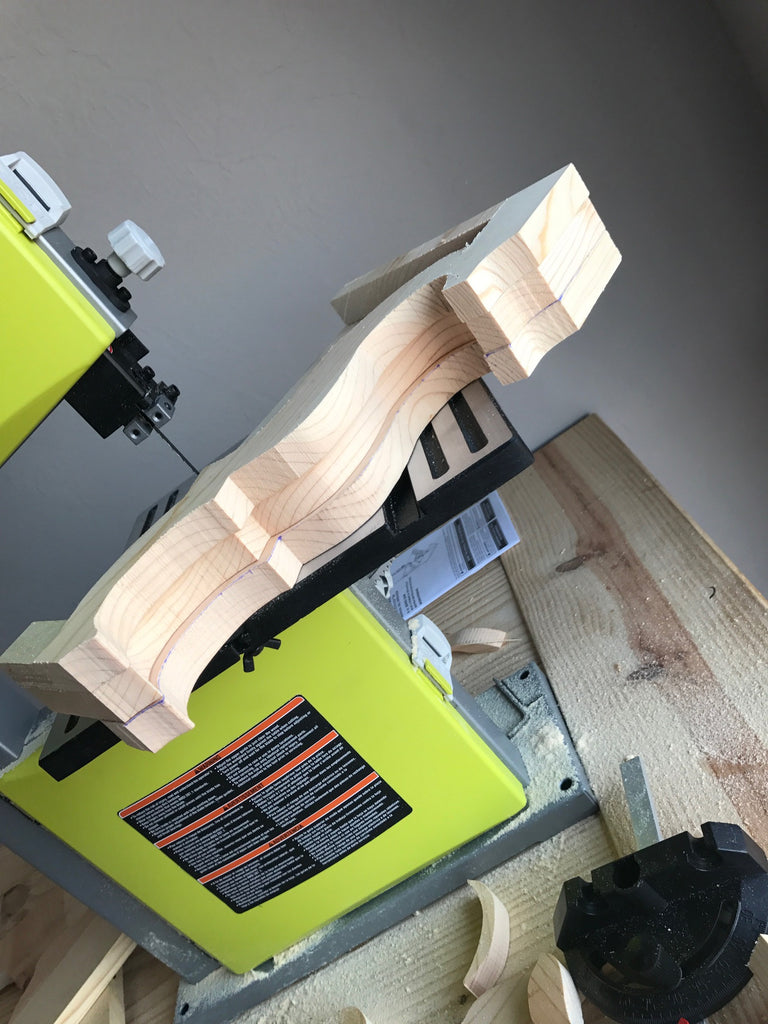
The middle piece should be about an inch shorter than the two outer pieces to give it a nice decorative look.
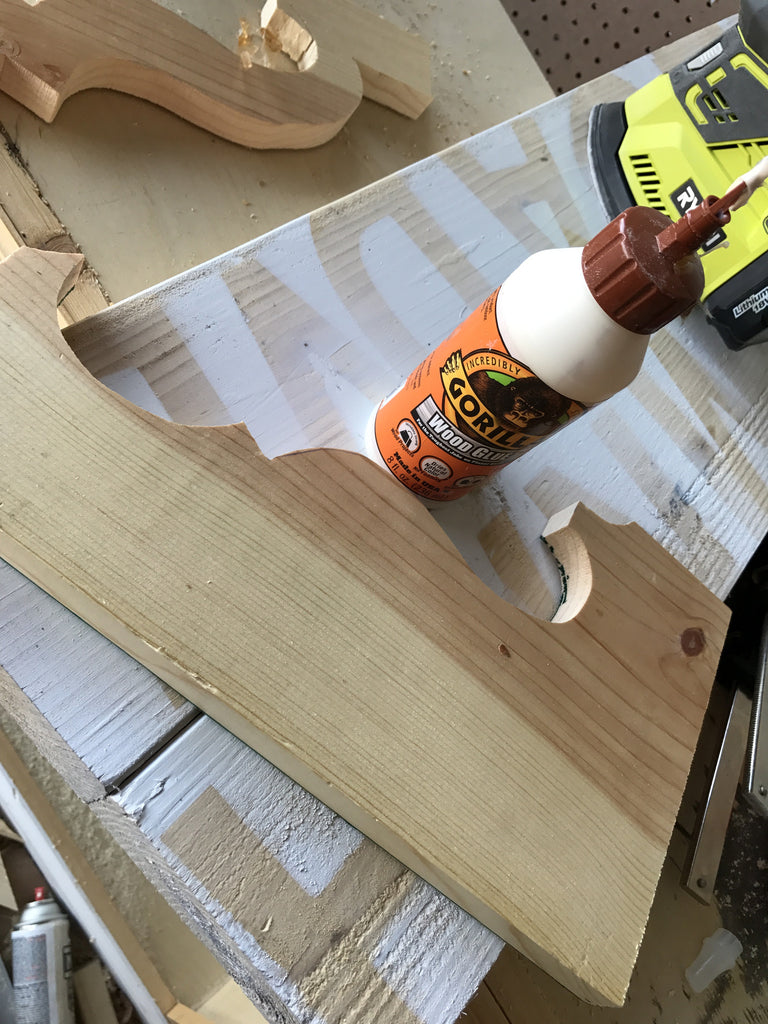 After cutting out the pieces I used my Corner Cat Sander RYOBI sent me to sand this baby down. And then glued the 3 pieces together with some good ole Gorilla Glue and secured using my Ryobi Brad nailer with some finish nails.

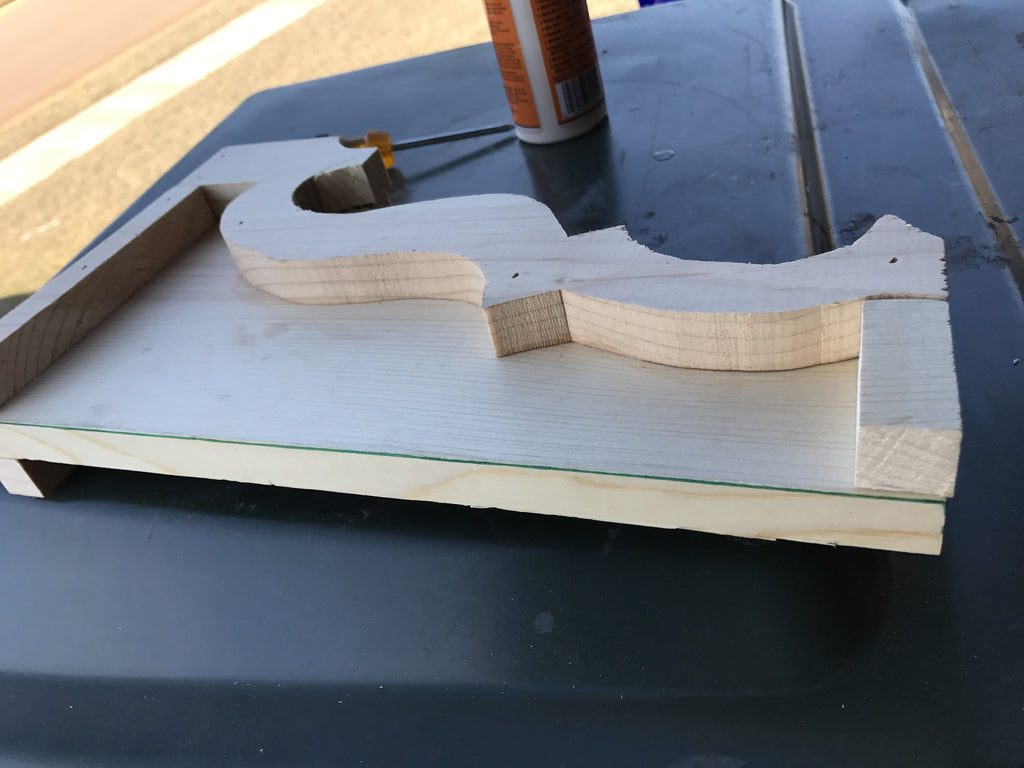
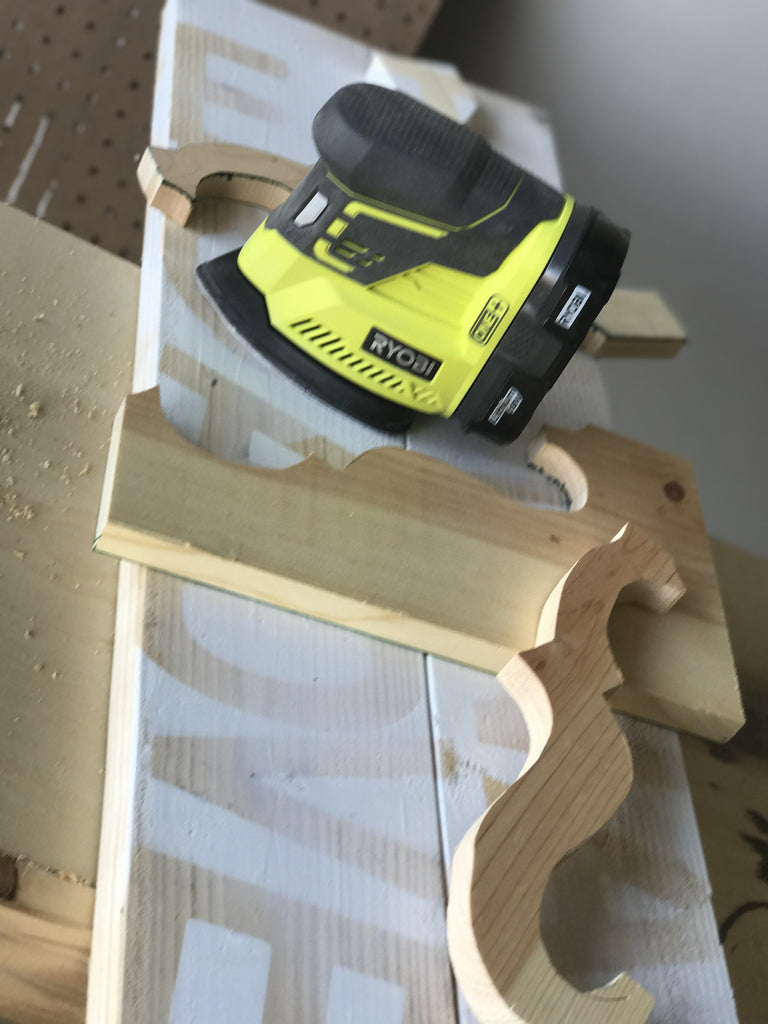
After gluing and nailing the 3 pieces together I added 1 inch pieces to both the top and bottom on both sides of the corbel to finish the look, securing them with both glue and finish nails.
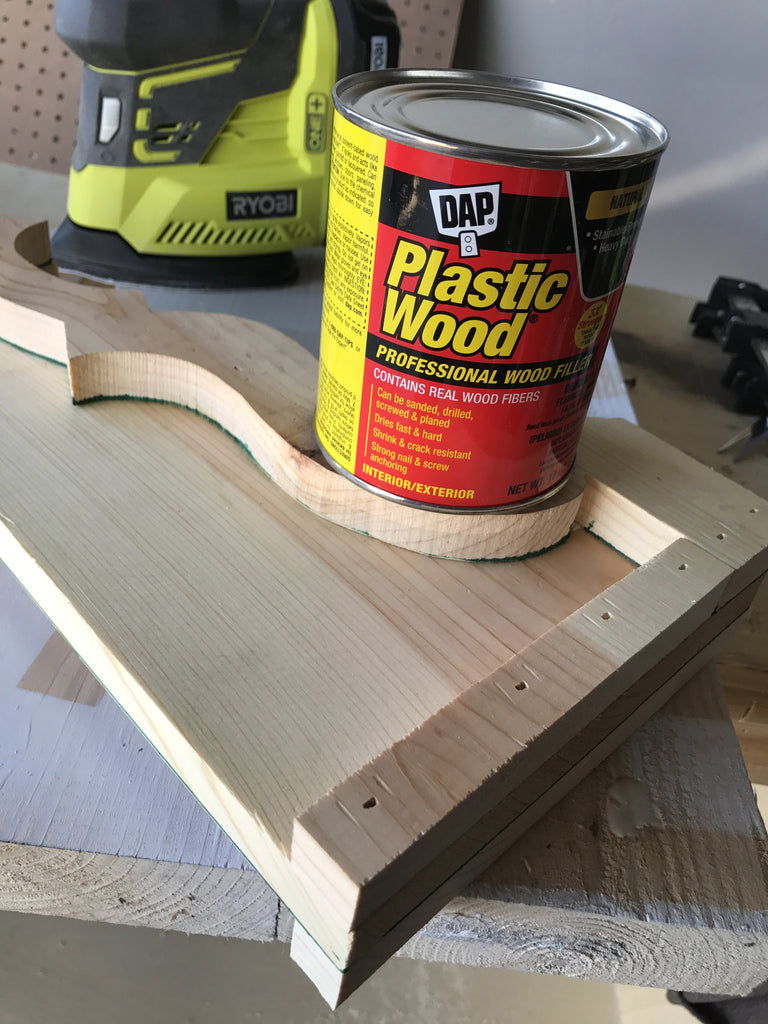 I used dap wood filler to fill in the holes. It is my go to! Definitely check it out! P.S don't use a dark green sharpie to make your lines haha luckily I'm painting over it!
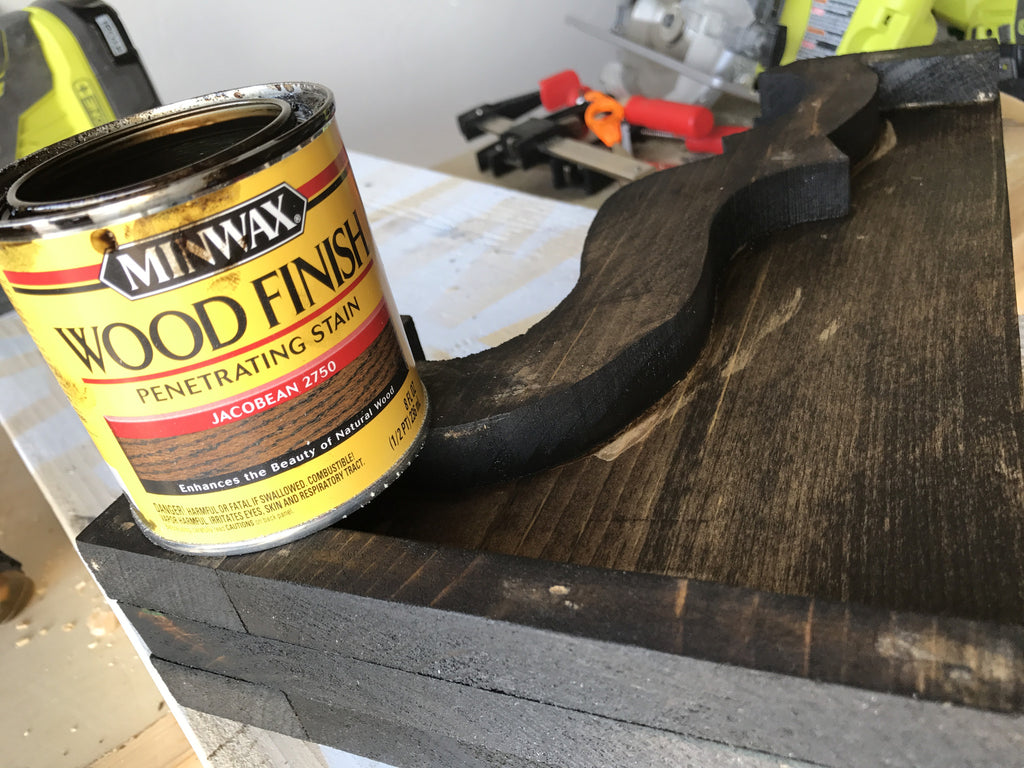
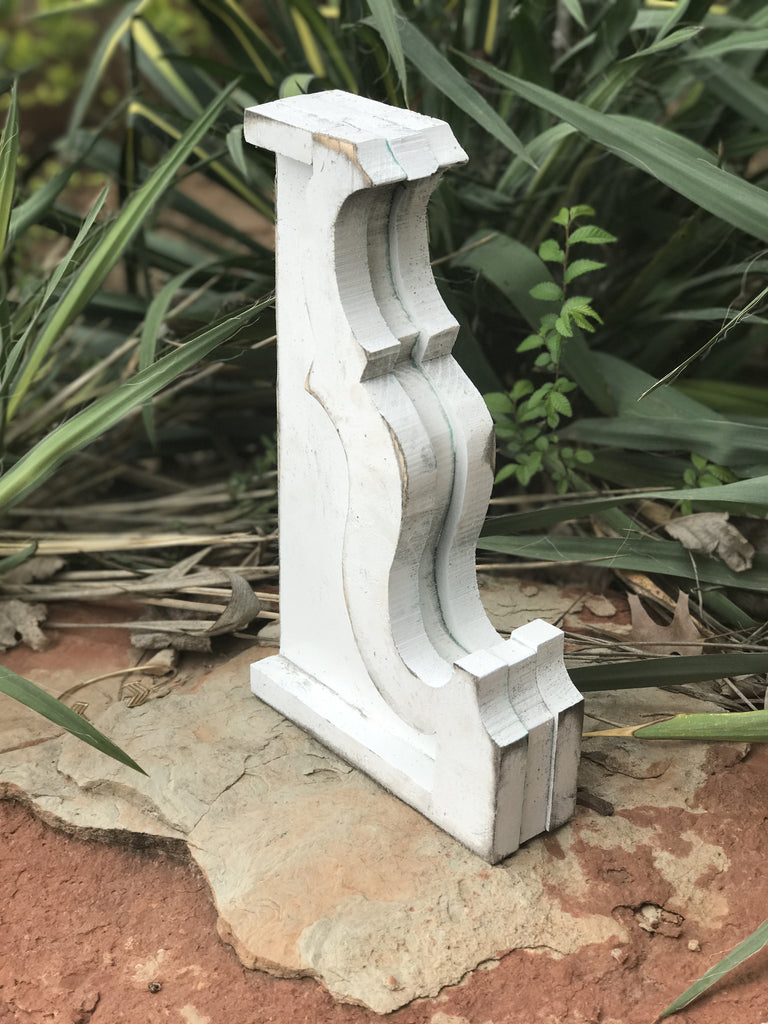
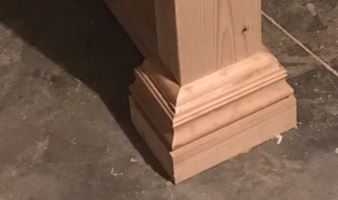
Now for the finish. First I stained the corbel with Minwax Jacobean. When your gluing your corbel make sure you wipe off the glue well or else you will be able to tell when you stain. haha OOPs. I let that dry for the day..
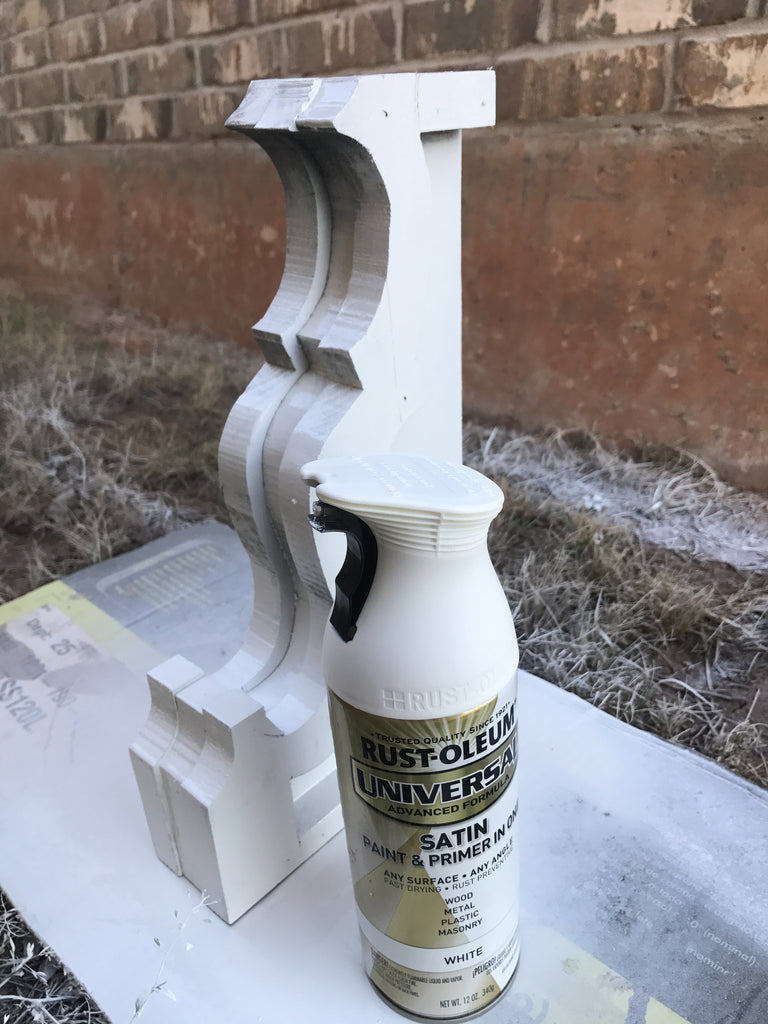
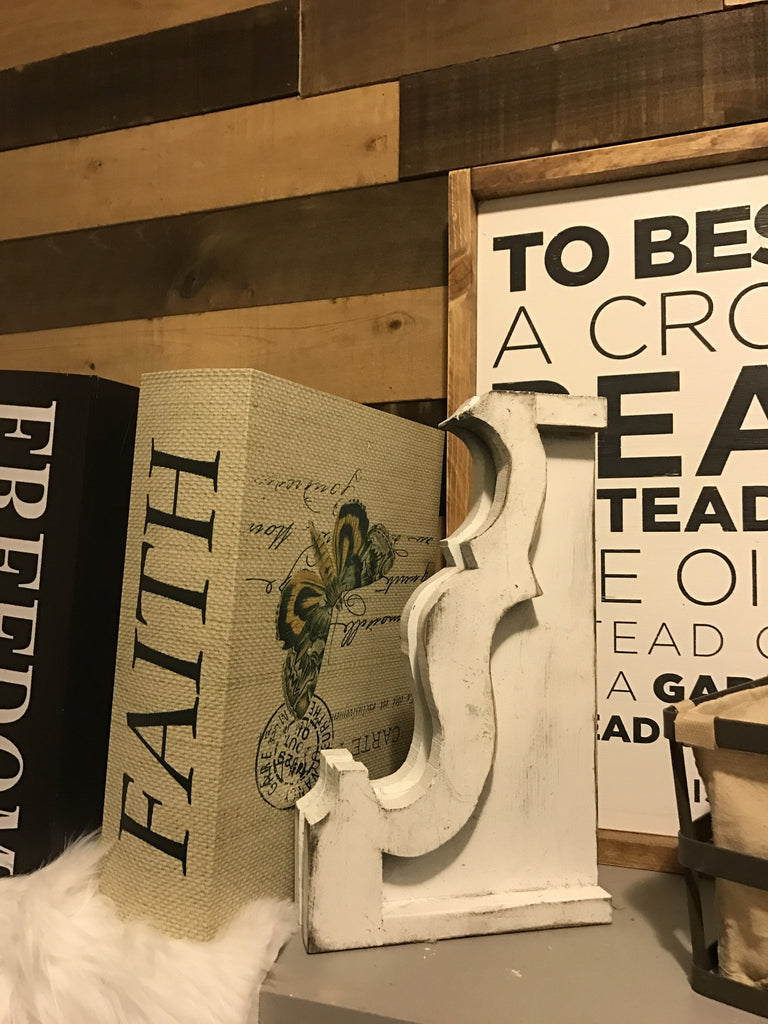
Once the stain was dry I sprayed over it with RUST-OLEUM Satin Paint and Primer, this stuff dries pretty quickly. Once dry I hand sanded the corbel with 220-grit sand paper to give it a antique look and that completes it! This was a super quick and easy project!
Don't forget to enter your projects on RYOBI Nation in Ryobi's contests for a chance to win $500 in power tools!
Be sure to tag me @smashingdiy on Insta in your own corbel creations.
Happy DIYing

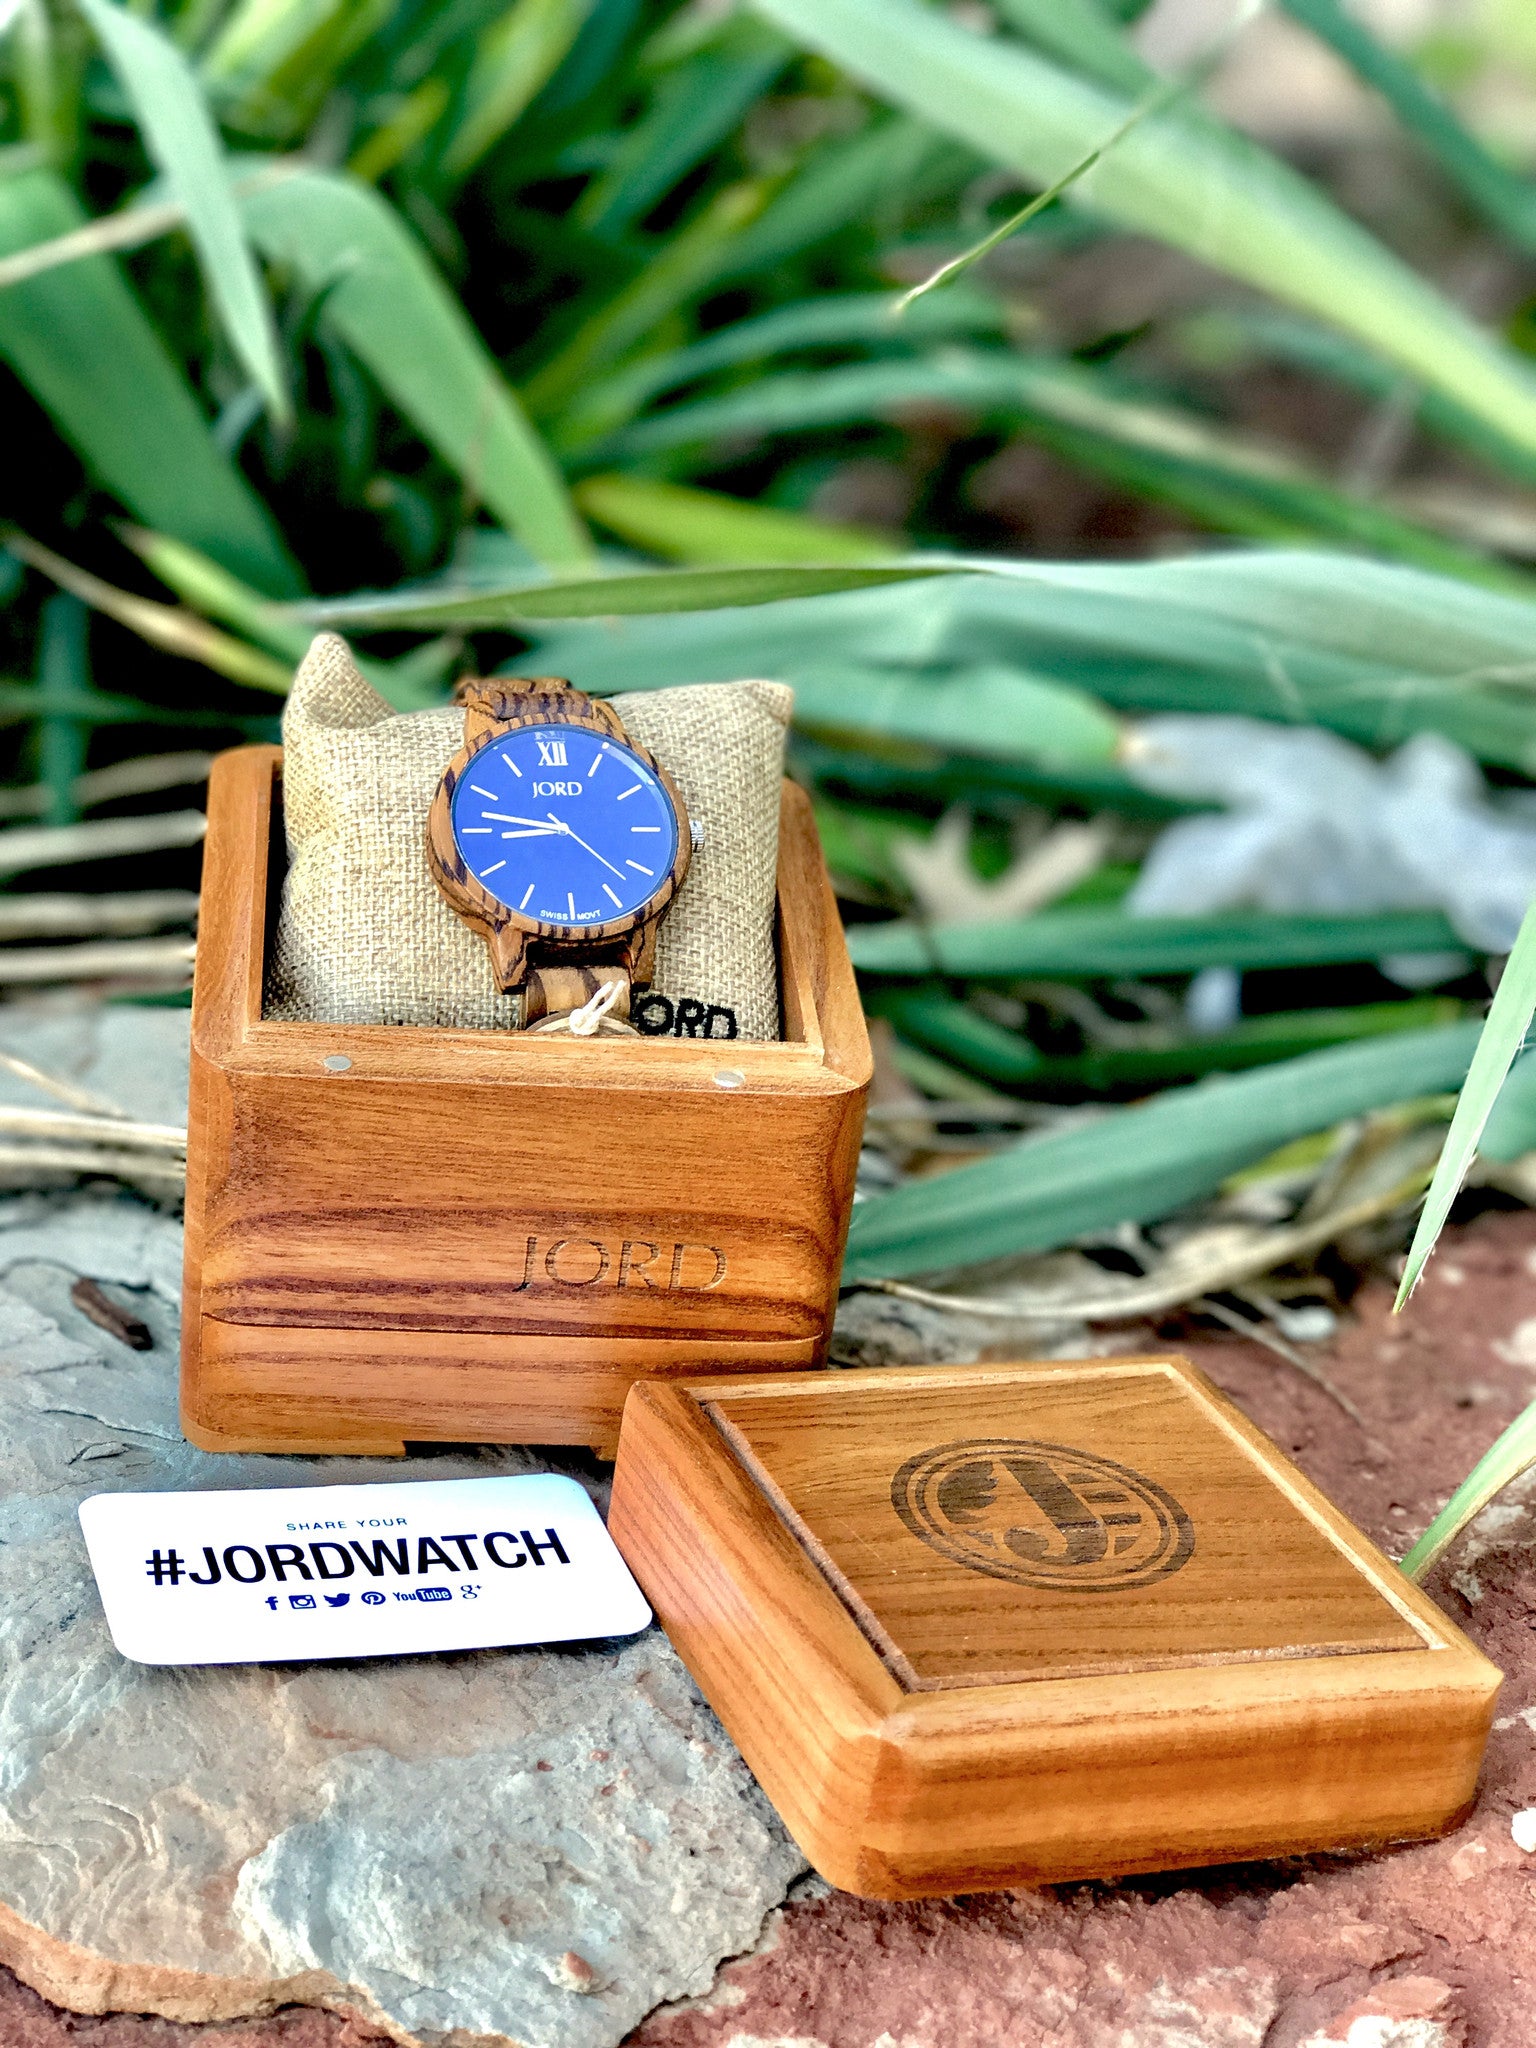
Spring is Blooming with JORD

ENTER GIVEAWAY HERE

Roman Numeral Clock Tutorial
This Roman numeral clock will make your walls pop!
I just LOVE Roman Numeral clocks, so I wanted to come up with this How-To for anyone to be able create one easily! Here goes..
(There are some affiliate links in this post, meaning I get a small commission if you purchase through these links, at no cost to you. Click Here to read my full disclosure)
Clock Materials Needed
- 24" Wooden Round
- Clock Face Wall Decal
- Rustoleum Linen White
- Annie Sloan Aubbuson Blue
- Credit Card
- Brush
- One small nail
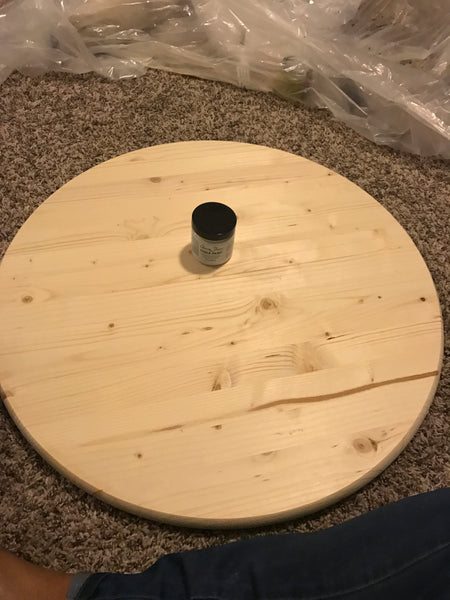
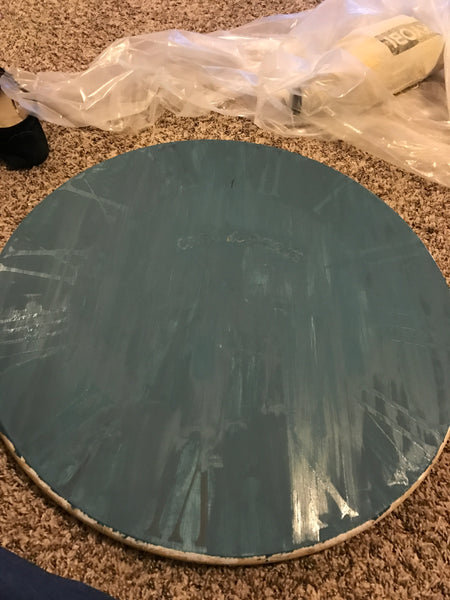
I love how simple and easy this Roman numeral clock was to make! I started off with this 24" round. For all you Non-woodworkers, Home Depot and Lowes has pre-made wooden rounds in all different sizes. "Home Depot's round isn't quit 24" so I'm not sure how it will work with this decal. I purchased mine from Lowes."
After the paint was dry, I applied the Roman Numeral Sticker Decal; my favorite part.
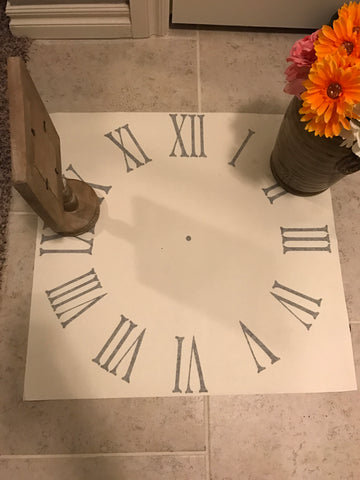
Amazon sells this Roman Numeral Clock Decal in 24" (it comes in other sizes too) that is perfect for a clock stencil. Wallpressions sells it for $9.99. WallSlicks sells it in other sizes but their 24" is higher.
It comes rolled up so I used a picture frame and pot to flatten it out.
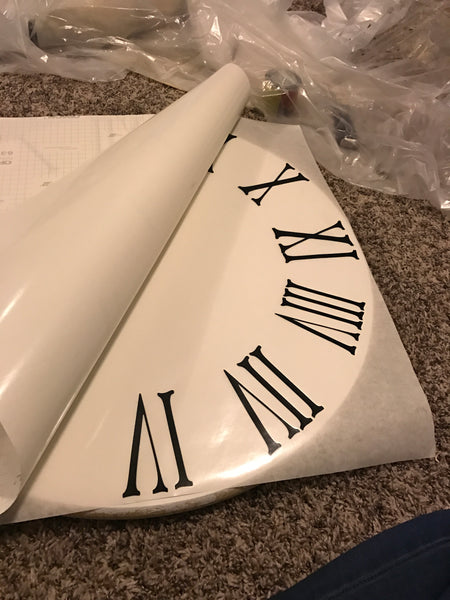
The sticker comes with instructions, but you peel the back side off. Flip it and press the letters into the round. Make sure you place the stickers where you want them before pressing down on the decal.
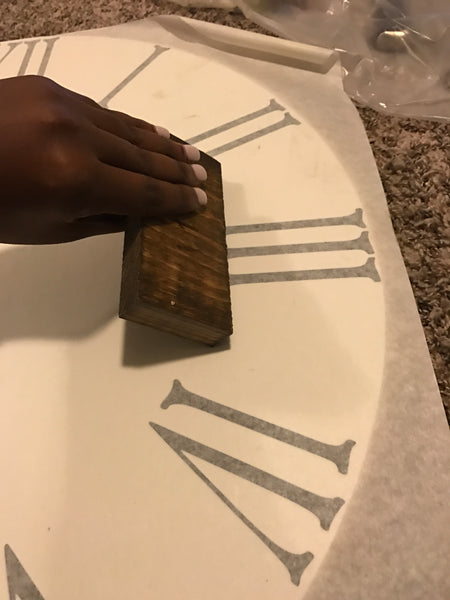
I used a scrap wooden block to make sure the letters would stick to the wood. A credit card would work GREAT for this too.
After pressing the decal down, I removed the top layer of the decal. Make sure to lift slowly to ensure the stickers stay placed on the wood.
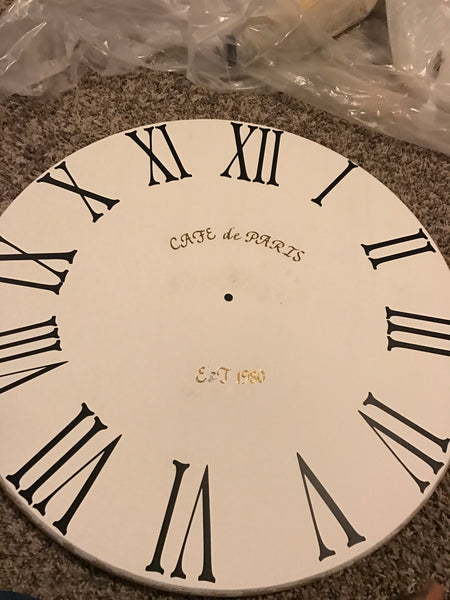
I added some small letter stickers to give the clock some extra PIZAZZ!! I pressed those down as well.
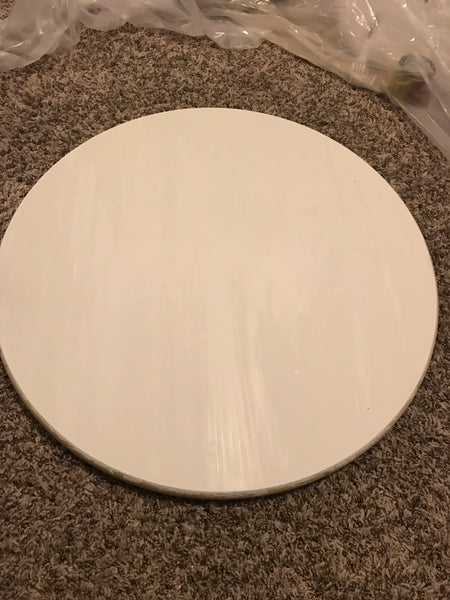
Once the Stickers and decal was placed I started painting over it! I used Annie Sloans Chalk Paint in Aubbuson Blue.
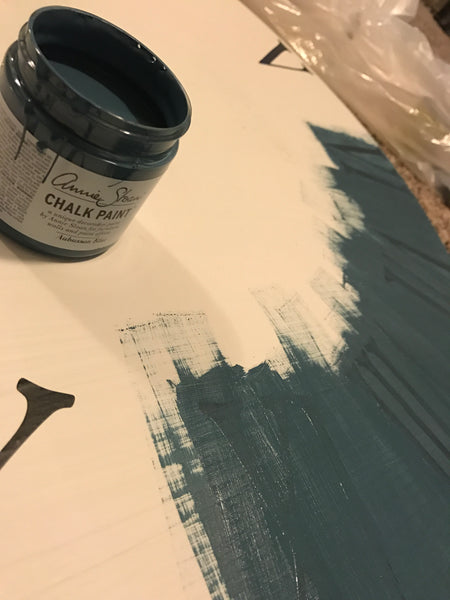
I painted over the whole round and then let it sit to dry!
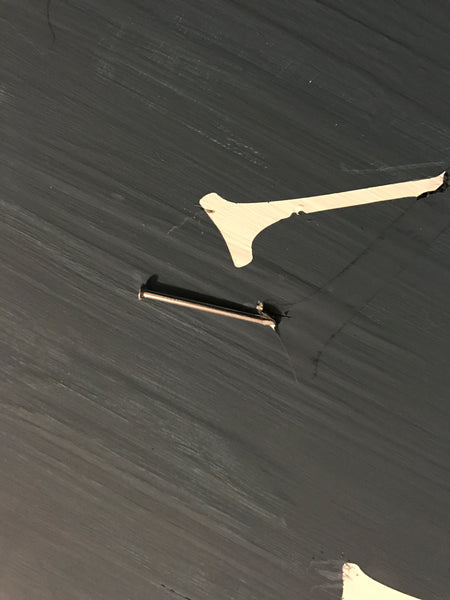
Once it was dry I started peeling the stickers! Another FUN part! I used a small nail to help lift the edges of the sticker, but be careful not to scratch the wood! After peeling I sealed it with Annie Sloan's Clear and Dark Wax.
WAAAAA-LAAAAAAHHHH!!! My Roman Numeral Clock was DONE!!
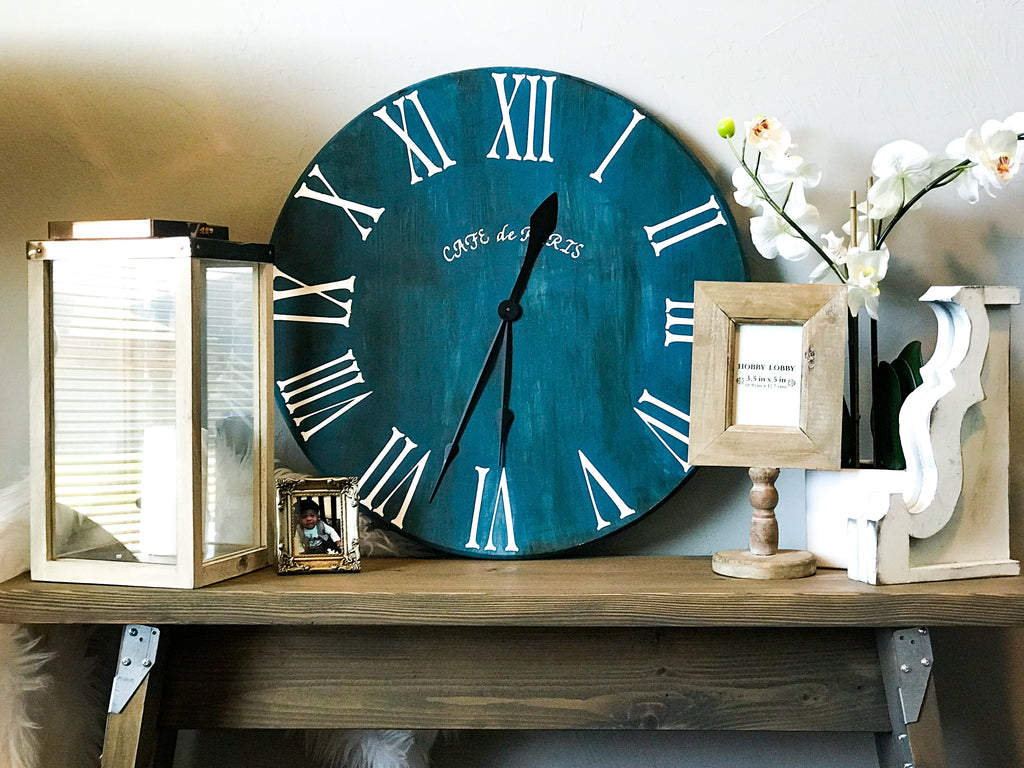
Feel free to add clock hands or put your own flavor on it! I would love to see your go at this project.

HAPPY CLOCKING!!

IG Builders Challenge

I think I just might be building one for myself!!! Thanks for reading!!!!

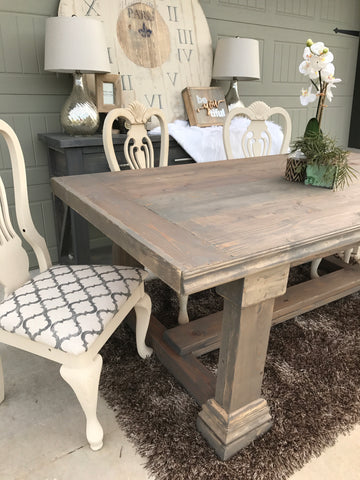
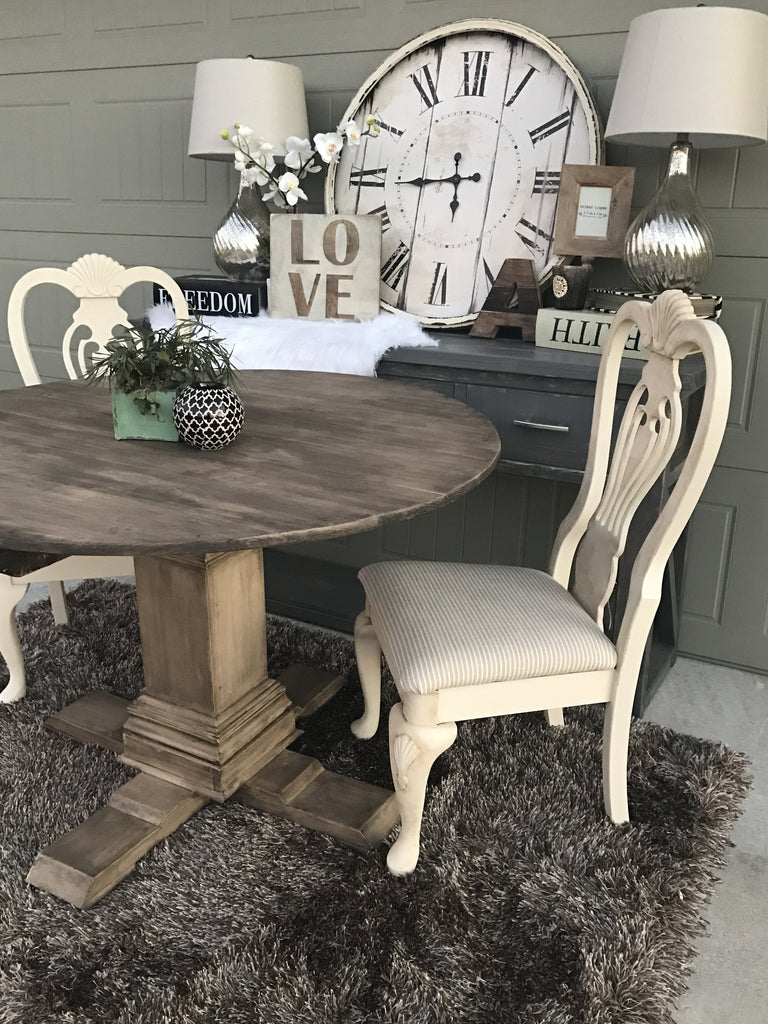
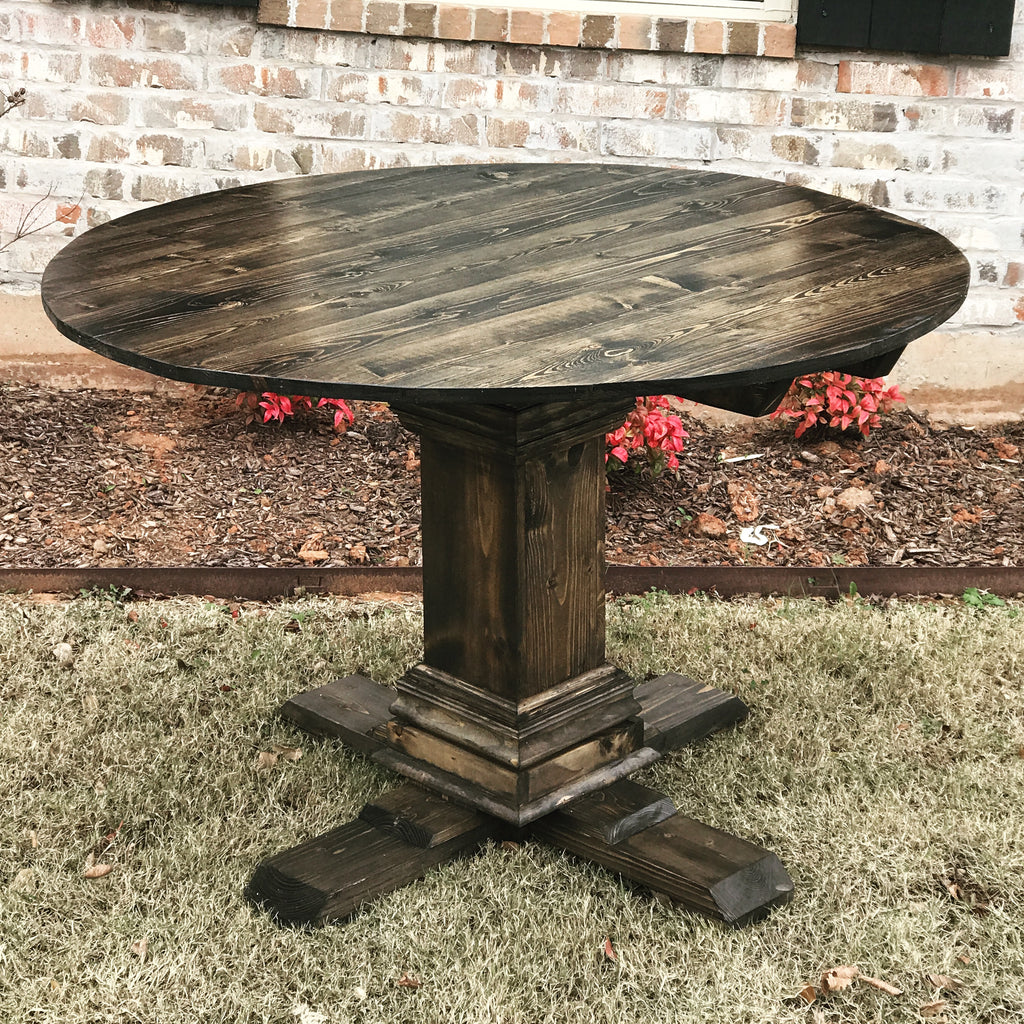
Round Pedestal Dining Table

So BEAUTIFUL!!I followed the plans on their site… And didn’t have many problems!
Lets take a look at my journey of building this table!
There are some affiliate links in this post, meaning I get a small commission if you purchase through these links, at no cost to you. Click Here to read my full disclosure)

Tip: Make sure all of your legs are nailed in evenly so your bottom is nice and solid!

Tip: If your staining your project, be mindful of where you place your nail holes!
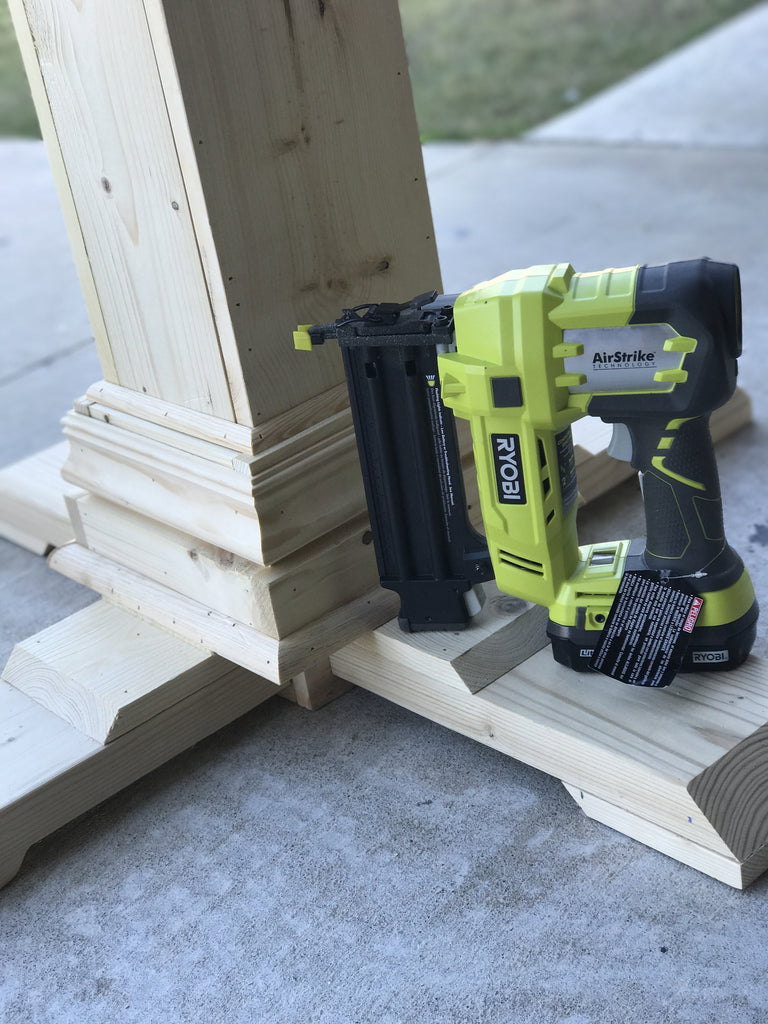
I used my Ryobi Cordless BRAD NAILER to nail my pedestal and it is by far one of my favorite Ryobi tools. I use it on almost every project I do. I actually won this amongst other tools in a contest on Ryobi Nation!
 Every month they have chances for 3 winners to win $500 in power tools. All you have to do is upload a project you've built/made. Its just that simple! Here are the tools I received from winning. Awesome Right?

Be sure to go check it out at Ryobi Nation!
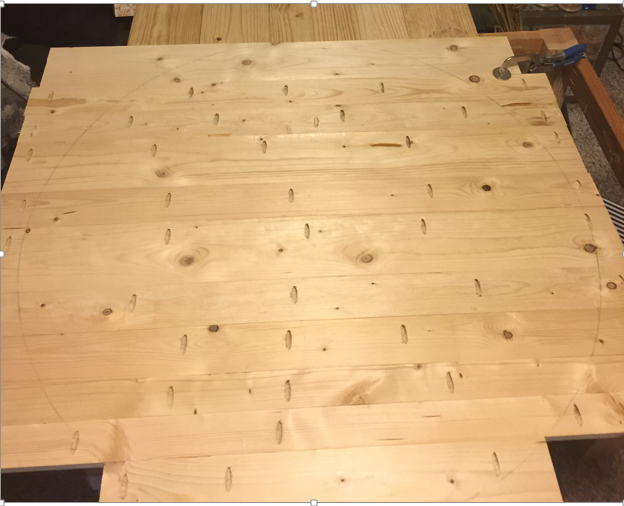
I joined the tabletop together using a Kreg Jig K4 Pocket Hole System on a 3/4" setting, Gorilla Wood Glue, 18 oz.
and 1 1/4" pocket screws and then cut it out with my Ryobi Jig Saw.

This was my finished base for the round table, I was so proud of myself for this one. After completing my build I used Dap 21506 Plastic Wood Filler, 16-Ounce to fill the nail holes and any other openings I wanted to close up.

For the finish I used:
Annie Sloans Chalk Paint in Old Ochre
Old Masters – Walnut
Old Masters Clear Finish
I painted the base first with the chalk paint and let it dry. I love chalk paint because it dries extremely fast.
Then wiped the walnut gel stain over top of it like I normally apply stain.

and here she is!!

Here is the same build using Minwax Jacobean!

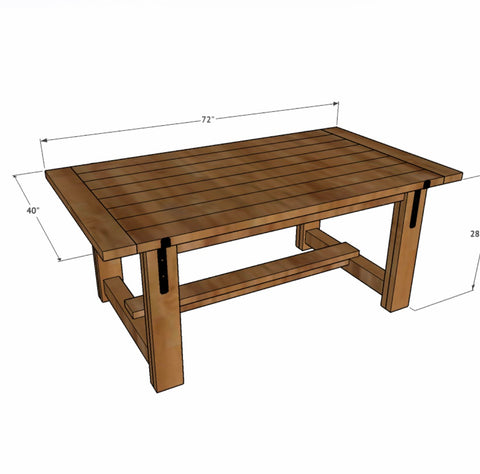
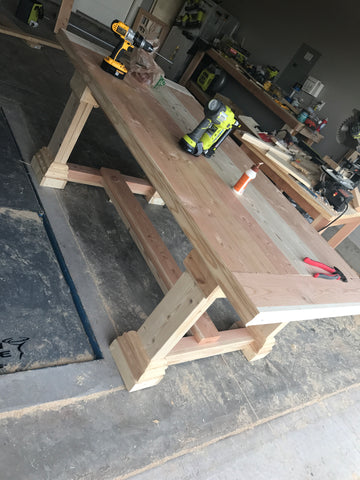
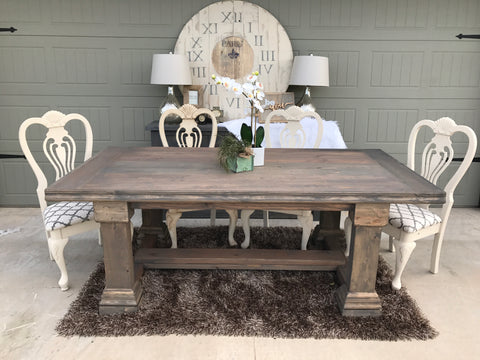
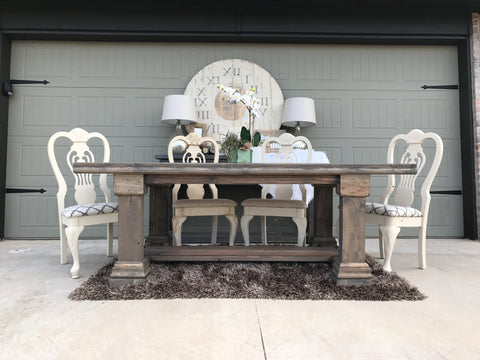
Trestle Dining Table
I looked at the plans for this dining table for a full month. Nearly everyday saying to myself “There’s no way you can pull this off” (No Lie) After staring at it for weeks I finally just said “I’m going to try it!” and I’m SOOOOOO glad I did!!
I got the plans for this from ANA WHITE’s website! (DIY QUEEN)
and only for a whopping $65!!!!
Mine was actually about $40 because I had extra 2×4’s from my last build so DIY WIN!!

These little suckers were tricky for me! It was my first build so I definitely learned a lot!!! But it was much easier for me to put the two middle straight vertical pieces together, assemble the long horizontal piece and then put in the diagonals using pocket holes ( just another excuse to use my Kreg Jig)
Different ways might work for different people but this worked best for me!
In the Ana White plans it says to countersink the screws…and I just read over that all willy nilly and didn’t even bother to countersink the screws. I learned quickly that without countersinking the screws it can cause your boards to split when drilling down! SO don’t be a cheater like me..
COUNTERSINK!!!!!:)
After finishing one leg, I repeated the same steps for the other one..and one became two!!

The legs seemed short…but once the table was assembled the table seemed like the appropriate height!!
Next was the cross braces and anchor pieces! I joined these to the legs with my handy dandy KREG JIG (I’m telling you guys this thing is GREAT) Im not sure how people build these things without one!

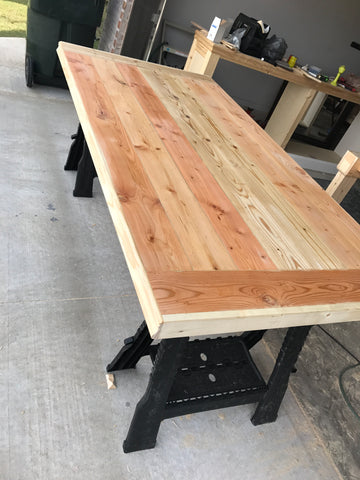
Once the bottom was finished I started chucking away on the top…

Can you guess how I joined the boards together?? haha KREG JIG!!!! Once the boards were together I filled the holes with wood filler!!! Now the wood filler I used was Minwax’s stainable wood filler in a tube! I learned later that this is not at all stainable and NOTHING like the MinWax wood filler in the can! It didn’t matter for the bottom since I used paint….but for the tabletop I could definitely tell. Luckily the weathered oak kind of matched the grey color that this wood filler dried as. 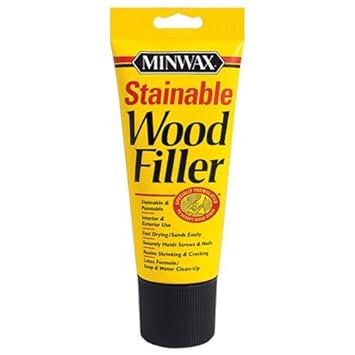
So for any projects you are staining. Don’t use this product!!! lol
I applied two coats of the weathered oak and let it sit to dry.
While this was drying I started on painting the bottom!!
Once the wood filler was all dry…I sanded her down and used a damp clothe to wipe it down so I could start painting.

I used Annie Sloans Chalk Paint (Old Ochre) that I had left over from a previous paint job to paint the base of the table and then went back over with Annie Sloan’s Clear and Dark Wax to give it the antique feel. You MUST have the clear wax if you use the dark wax! This is kind of an eye thing. You rub the whole base down with clear wax and then just rub the dark wax sporadically to give it the textured look!

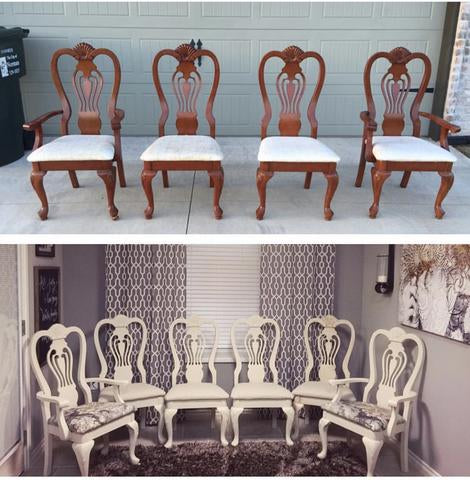
I used the same chalk paint for my dining chairs, man do I love a good before and after.
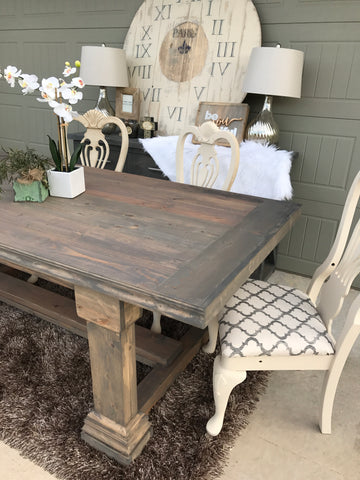
After this was all dry..which didn’t take long….It was time to put a clear coat on the table top!

I used 3 coats of Minwax’s Water Based Polycrylic Protective Finish. I sanded the tabletop with 220-grit after the poly dried between coats!
After the table top was dry…I connected the table with pre-drilled pocket holes and a few screws and there you have it!!


This table looks great in my dining space!!


Mirrored Vanity
A mirrored vanity makeover well worth the work!
Now that doesn’t look too bad (if you were born in the 70s) haha.. but I was looking for something a little more sleek and sheek!
 To start the process off, I spray painted the desk first with Krylon Primer, White, 12 Ounce
 and then generously with a Krylon Spray Paint.

I applied a generous amount underneath, pressed the mirrors down in the appropriate spots and clamped them down with small clamps to hold the mirror into place.
 I let this sit for about 24 hours. I know we all hate the waiting game but you must give ample time to let the adhesive. dry or else you’ll be wondering why your mirrors are hanging off 6 months down the road.

I had to take the drawer off to apply these so I could sit the drawer upright.
I glued the knobs on using strong glue, a really strong glue, so be careful not to spill it anywhere. I applied just enough for it to stick and let it sit for another 24 hours. (that’s right …more waiting) After that was dry , I put my drawer back on and that was that! My old wooden table became a BEAUTIFUL VANITY.

LETS CHECK OUT A BEFORE AND AFTER!!

The perfect match to my makeup vanity! (Purchased from Impressions Vanity)
 I would LOOOOVE to see how your mirrored projects turn out!