Bathroom Renovation and Remodel | Design Ideas to Inspire
"A Bathroom remodel with a design you'll never forget."
After five years of building, I finally got to tackle the project I've been wanting to do the most; a bathroom renovation. My parents have been talking for years about how they wanted to update their older upstairs bathroom, so I'm making it happen!
"This post is sponsored by The Home Depot."
Luckily, with the help from Home Depot and Kohler, I had the opportunity to completely transform my parents bathroom and give them a renovation of their dreams.
There are some affiliate links in this post, meaning I get a small commission if you purchase through these links, at no cost to you. Click Here to read my full disclosure.
Featured Products Used
-
Kohler Harken Double Vanity in Linen White
- Kohler Single Flush Elongated Toilet-Sandbar
- Kohler Elmbrook 60 in. Rectangular Bathtub
- Kohler 3-Spray Tub and Shower Faucet
- Kohler Cursiva Toilet Paper Holder
- Kohler 28" Round Decorative Mirror
- Kohler Simpalo LED Semi-Flush Mount
- Kohler Hauksbee 4-Light
- Kohler Levity Semi-Frameless Sliding Tub Door
- Kohler Cursiva 24 in. Towel Bar
- Kohler Devonshire Bathroom Faucet
Time to Complete Project: 5 weeks
For a detailed list and cost breakdown, see below!
The Before
As always, I like to give you guys a look at the before photos, so here it goes. This is one of three bathrooms that my parents have in their house and it was the oldest one. So naturally, it was the first bathroom they volunteered when I asked them if they would like a bathroom remodel.

As you can see, the bathroom was pretty outdated and my mom really wanted different floors in here. Im happy to report that my mom is very satisfied with her new floors.

If you have a bathroom that looks similar, hopefully this tutorial will give you an idea on how you too can change your bathroom.
The Demolition | Bathroom Reno
The demo is always my favorite part of a renovation because it always feels good to just rip things out; in some ways its a little therapeutic for me! We were able to get everything ripped out in a day and a half.

Luckily, I had a lot of help on this project, and most of you saw Papa Fred and I tackle this Reno together! This is the first project where I was able to work with my dad and I must say we make a great team!
One of the many questions I received was, "What in the world did you use to cut that tub in half." I used my handy dandy reciprocating saw. Head over to instagram to see it in action!

Since this was a full bathroom renovation, we had to remove everything except the exiting drywall. We did leave the light up until the very end however, to make sure we had some light.
Tiling the Floor | Bathroom Reno
I was most excited about this part of the bathroom reno because I was just as tired as those floors as my mom was. I decided to spend a little more on the floor and opted to go with these mosaic tiles.
First, we laid down backerboard and secured it down to the floor with adhesive and screws. Once that was down we were ready for tile. While my dad laid down the tiles, I cut the tiles; this really made the tiling go a lot faster vs. me doing it all on my own.

I've raved about my tile saw many times before and I still love that thing. Its accuracy with cuts is spot on and it makes tiling projects so much easier.

We were able to get all of the tile laid over two days. Once the thin set was dry, I grouted the tile with pre-mixed grout. I opted to go with white because I wanted to mute the floor a bit. As you can see below, the grout definitely toned it down a bit and gave me the look I was searching for.

To complete the floor I sealed it to make sure the floor stays nice and clean.
Installing Tub and Shower | Bathroom Reno
In order to get the shower space ready for the tub, we had to add in a few 2x4s so that the tub would fit, once we got the area ready, we called one of our friendly plumbers to come set the tub. He came in one afternoon and got it all set up for us.

Once it was set in place, we were able to screw the tub to the 2x4s and start adding the backer board.

Once the backer board was all secured down with screws, we started waterproofing the board using Redgard; it's also recommended that you cover the seams with tape and thin set to make sure the seams are completely secured.
The porcelain tile I used looked amazing but was extremely affordable. I splurged on the floor, so I used something more affordable on the shower but you'd never know it because it still looks great.

We let the RedGard dry for 24 hours and then we were ready to tile. This tiling process was similar to the last except it was on the wall. I wanted to lay the tiles vertical straight to make the shower feel like it was all one piece.
This was my first time using these spacers and I absolutely loved them; definitely will be using these spacers again.

I used the same grout that I used on the tile floor. I didn't want the lines to be visible so I opted for white and man does it look good.
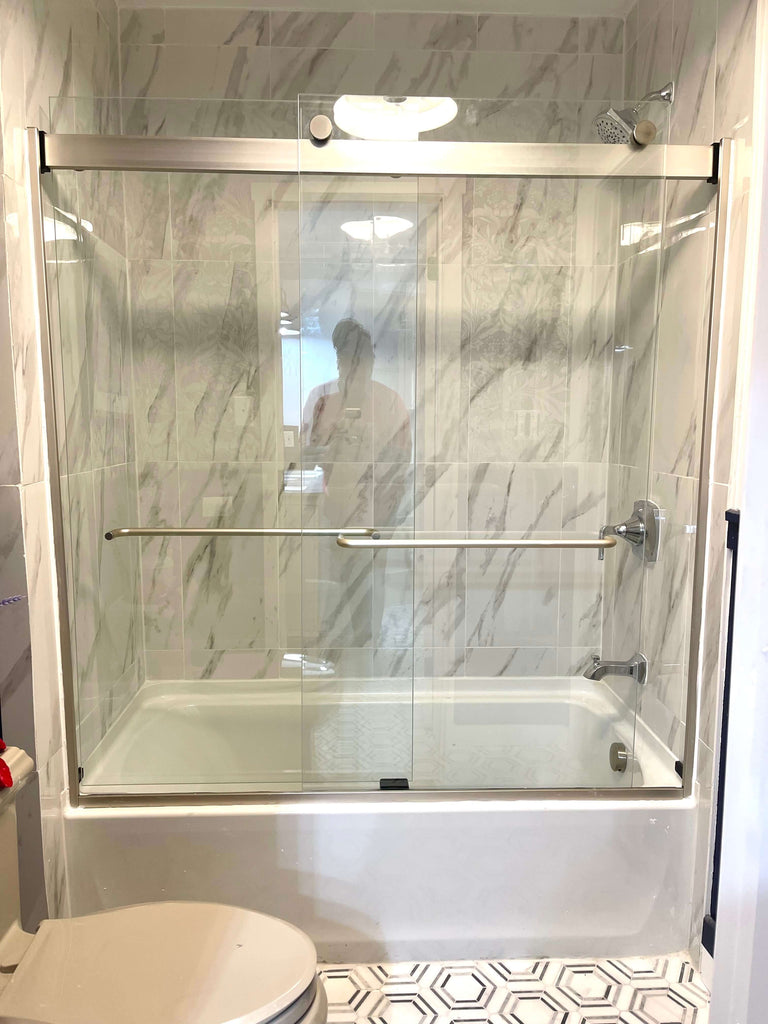
With all of this hard work, I couldn't just slap a shower curtain up here, so I decided to add this sliding shower door and I'm so glad I did! It definitely elevated the look of the shower. It was the perfect match to the Kohler 3-Spray Wall-Mount Tub and Shower Faucet.
Replacing the Doors | Bathroom Reno
With replacing everything, we couldn't forget about the doors and man did these doors really change up the feel of the room. I went with these 5 paneled doors and I just love the look of them.
We were able to hang these pretty easily. They are pre-hung doors, so we just placed it in the door frame, set it with shims and secured it back to the frame.

We found these door trim kits at The Home. Depot and decided to trim out all the doors with these kits.

Installing Wainscoting | Bathroom Reno
With all of the heavy lifting out of the way, it was time to add some character to the space. I decided to add wainscoting to the walls to give it a little flair.
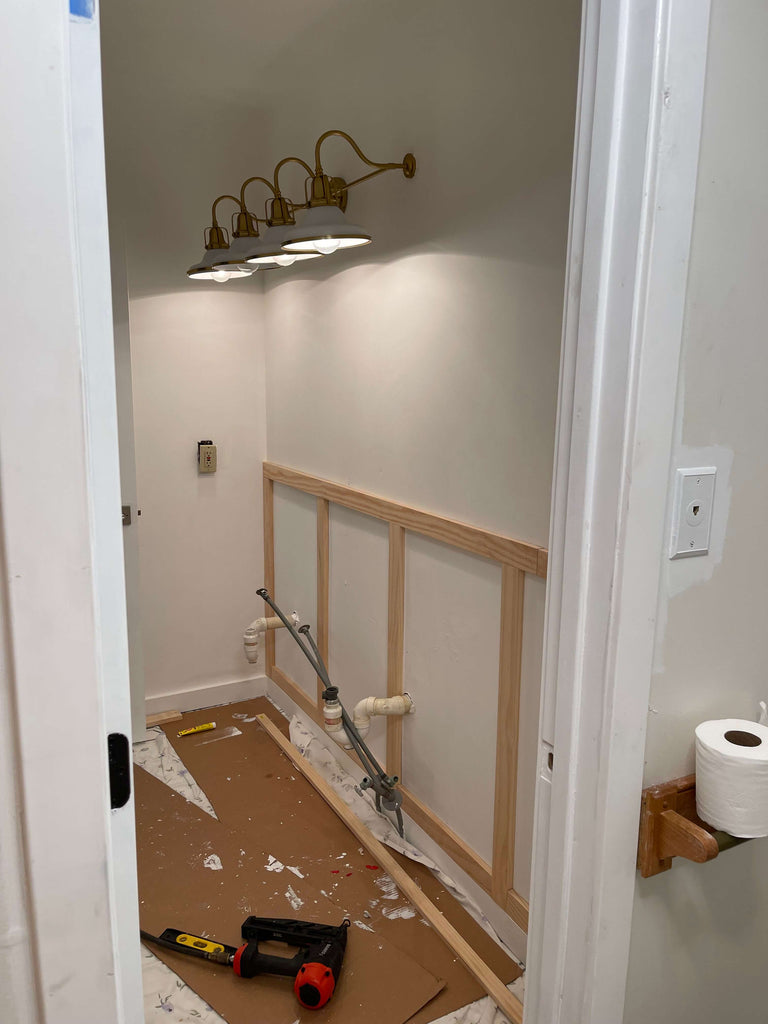
I used 1x3 select pine for the bottom wainscoting and attached it to the wall using a brad nailer. Once it was attached, I used caulk and wood filler to fill all of the cracks and holes.

Once the wallpaper was installed, I added a 1x2 trim piece to the top to finish it off. My mom mentioned that she likes blue, so I decided to paint the wainscoting with this dark navy. I usually use a higher sheen when I'm painting in bathrooms because of the moisture.
Installing the Toilet | Bathroom Reno
Now most people wouldn't get excited over a toilet but I did with this bathroom renovation because I was so excited to try this toilet out. Additionally, I absolutely fell in love with the color when I first saw it and I knew it would be the perfect color to bring some good contrast to my design.

Aside from the color, the one thing that really impressed me about this toilet was the system in which it's installed. The system underneath is independent from the toilet, so it made it really easy to take off the toilet without having to remove the wax ring.
I also like that its a little wider and taller; as my parents get older they will appreciate it for sure!

I knew this would be the perfect addition to my design and I couldn't be more happier with this addition.
Building a Custom Cabinet | Bathroom Reno
My mom previously had a big linen cabinet in her bathroom and wanted to keep it, so I opted to give her a more modern sleek cabinet. I decided to lower it to make the room feel a bit larger.
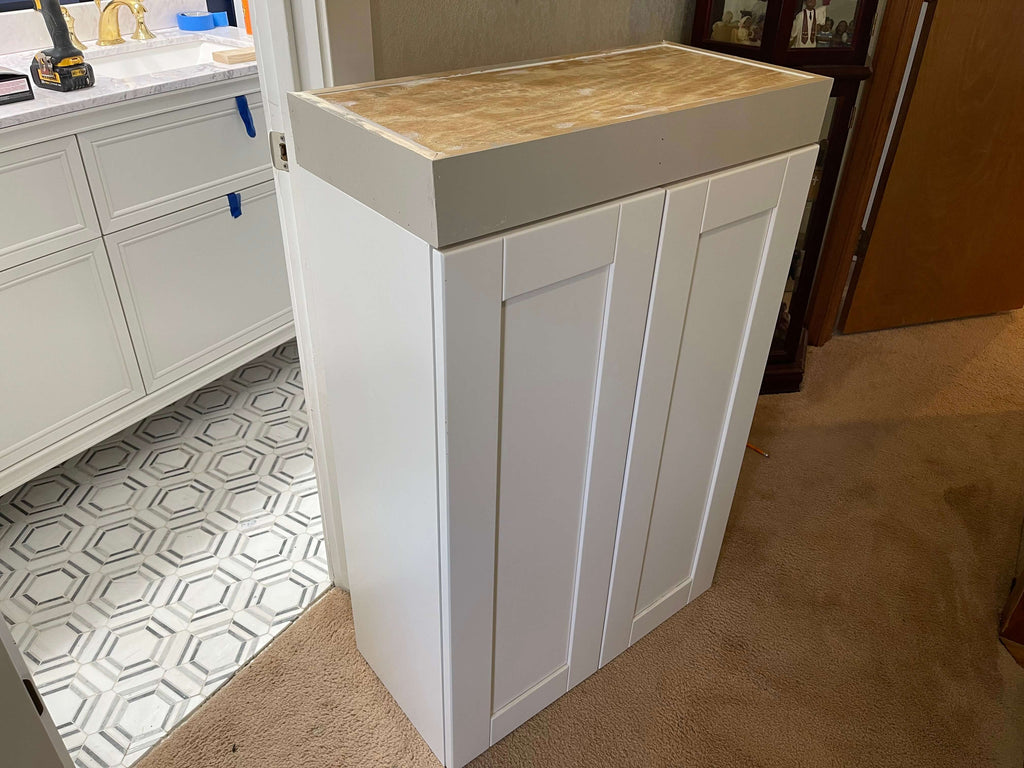
To create the cabinet, I used two shaker style wall cabinets to create one full cabinet. This saved loads of time, as I was on a tight timeline.

In order to make it look like one cabinet, I added a bottom wood piece and a middle wood piece, so that when I attached them together it would look like a solid piece when painted.

Then I added trim on the two sides to bring it all together. I used caulk and spackle to fill in all of the cracks and holes.

With the wainscoting being blue and the vanity white, I wanted to break it up a bit and choose a color similar to the toilet to ground everything. I decided on this color Behr Grey Mist and I really like how it played off the existing colors.
Finishing Touches | Bathroom Reno
I always enjoy seeing a room coming together and I was anxious to get to this part of the bathroom reno. I bought this wallpaper a few months back for my pantry, but couldn't use it.
When this bathroom reno came up I knew immediately that I wanted to use it here. It elevated this bathroom for sure and was such a good match to my other design choices.

I also have to rave about this Semi-Flush Mount Light because this has to be the brightest light I've ever installed. It brought in so much light which is a great choice for a smaller space.
Being that the light, mirror and bathroom fixtures were gold, I didn't want the vanity area to be overwhelmed with more gold, so I found these Acrylic pulls that were the perfect addition to the vanity and the area as a whole.

With everything in place, we added in the Kohler 4-Light 47 in. Sconce and Kohler 28" Round Decorative Mirrors; it was a perfect match to the Kohler Devonshire Bathroom Faucets.
The great thing about this vanity countertop was that it had a hint of purple which really contrasted well with the blue wainscoting and the wallpaper.

Now you may be wondering, "what would something like this cost?" Well here is a breakdown of everything. Some of my items were on the high end, so if you're on a tighter budget you can swap out items for something more affordable, but here is my specific breakdown.
Cost Breakdown | Bathroom Reno
| Bathroom Reno Products | Cost |
| Mosaic Floor Tile | $1418 |
| Tile Accesories | $284 |
| Porcelain Wall Tile | $241 |
| Kohler Harken Double Vanity | $2298 |
| Kohler Single Flush Toilet | $1566 |
| Kohler Elmbrook Alcove Bathtub | $332 |
| Kohler Tub and Shower Faucet | $175 |
| Kohler Toilet Paper Holder | $29 |
| Kohler 28" Round Mirror | $195 |
| Kohler LED Semi-Flush Mount | $1249 |
| Kohler 4-Light 47 in. Sconce | $869 |
| Kohler 24 in. Towel Bar | $33 |
| Kohler Bathroom Faucet | $854 |
| Kohler Sliding Tub Door | $445 |
| Double Sink Vanity Countertop | $498 |
| Shaker Style Cabinets | $340 |
| Wainscotting/Door Trim | $560 |
| Wallpaper | $170 |
| Plumber Services | $550 |
| 3 Five Paneled Doors | $890 |
| Acrylic Pulls | $62 |
| Paint and Brushes/Rollers | $175 |
| Outlets/Switches and Covers | $35 |
| Miscellaneous Items | $500 |
| Total Cost | $13768 |
The Final Reveal
Now for the moment you all have been waiting for; the final reveal.

This bathroom came out exactly how I envisioned it and in some cases even better than I imagined. My parents are super happy with how it turned out and very grateful for their new bathroom.

Overall, I was extremely impressed with the Kohler products that I used in this bathroom renovation. They have some solid pieces and the pictures tell it all.

But the toilet just does it for me. It's such a statement piece and I love that its something different. I was able to tie it all in and it really makes the room pop.

If you have been on the fence about wallpaper, I'm hoping this design gets you closer to adding it into your spaces because it is a game changer.

As always, thanks for reading guys! XOXO Ashley